Portal Home > Knowledgebase > Email Related Issues > E-Mail Clients > ThunderBird > How to configure account in ThunderBird?
1. Open Thunderbird.
2. Click the 'Tools' menu, and select 'Accounts Settings'
3. Click the Account Actions button.
4. Click Add Mail Account.
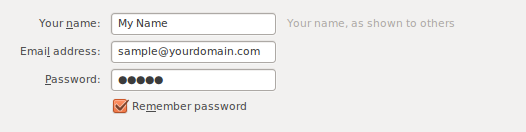
5. Enter your name as you would like it to appear on your outgoing mail messages.
6. Enter your E-mail address.
7. Enter your E-mail password.
8. Click the Continue button.
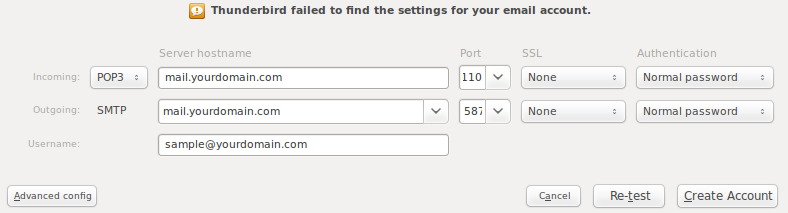
9. Thunderbird will now attempt to setup the account automattically. It will create an IMAP account and will not use SSL.
10. Once the automatic setup has completed click on Advanced Config.
11. Enter the information
Incoming:-
Select POP3 if you would like to create POP3 account
Server Hostname: mail.yourdomain.com Port: 110
Outgoing:-
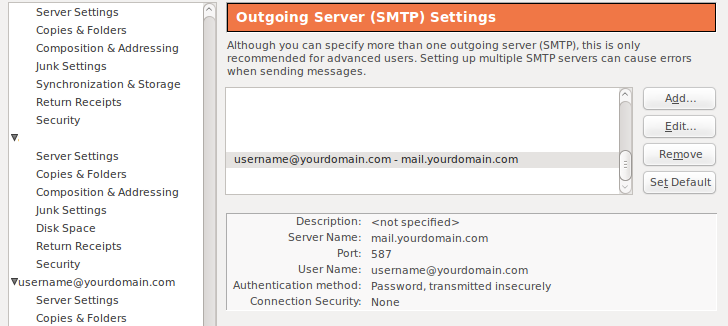
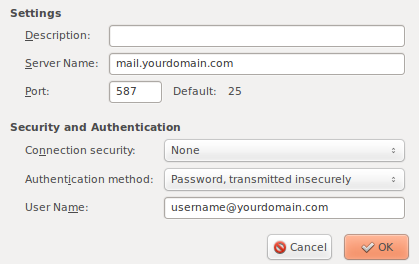
Server Hostname: mail.yourdomain.com Port: 587 or 25
12. Click Create Account.
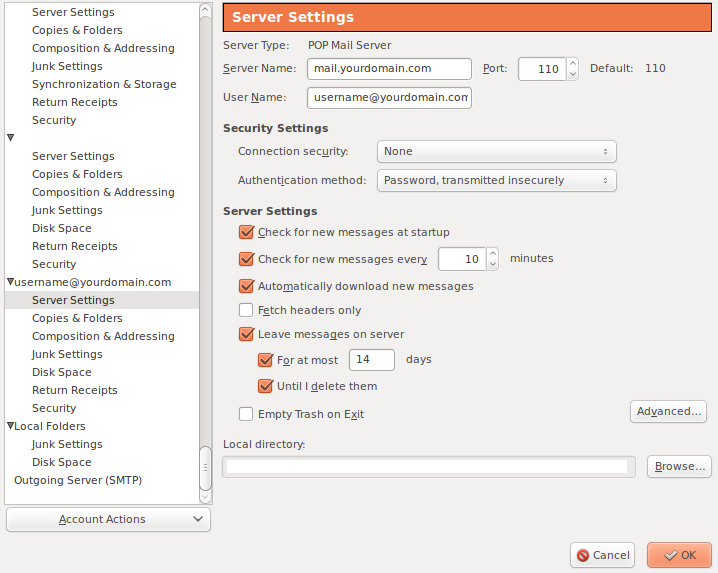
13. Under Security settings, choose Password, transmitted insecurely.
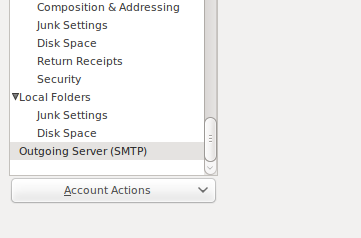
14. Then clik on the Outgoing server (SMTP)
15. Highlight the email account you just created and click Edit.
16. Put your username: username@yourdomain.com
17. Then, you're done.
 Add to Favourites
  Print this Article